
So your TMM Connect’s just arrived, how do you get it up and running?
Add the TMM Connect to your WiFi network
- Go to Manage -> Machines
- Click Provision a DataSource
- Connect your DataSource to your computer with a USB-C Cable
- Click “Click to connect”
- You should be able to pick a device called “DataSource” in the menu dialogue
- Enter your WiFi credentials password
- Click “Update WiFi details”
- Wait for the TMM Connect to receive your WiFi credentials
- Once the TMM Connect has your credentials and is connected to the WiFi, there should be one LED on and the other should be flashing
- Once the TMM Connect connects to our server, the second LED should be on
- You can confirm the TMM Connect is working when both LEDs are on and solid
Install the TMM Connect into your CNC Machine
Find the machine power supply
- Has read and understood the information presented here
- Is aware of the possible dangers and acts accordingly
- Is familiar with electrical machinery
- Is trained and authorized to work on electrical machinery
-
Check the TMM Connect for any damage, if it is damaged contact support
-
Isolate CNC Machine
-
Screw the antenna onto the TMM Connect
-
Plug the bootlace ferrule of the positive side of the DC cable into the 24v supply in the back of your machine cabinet, there should be many available sockets.
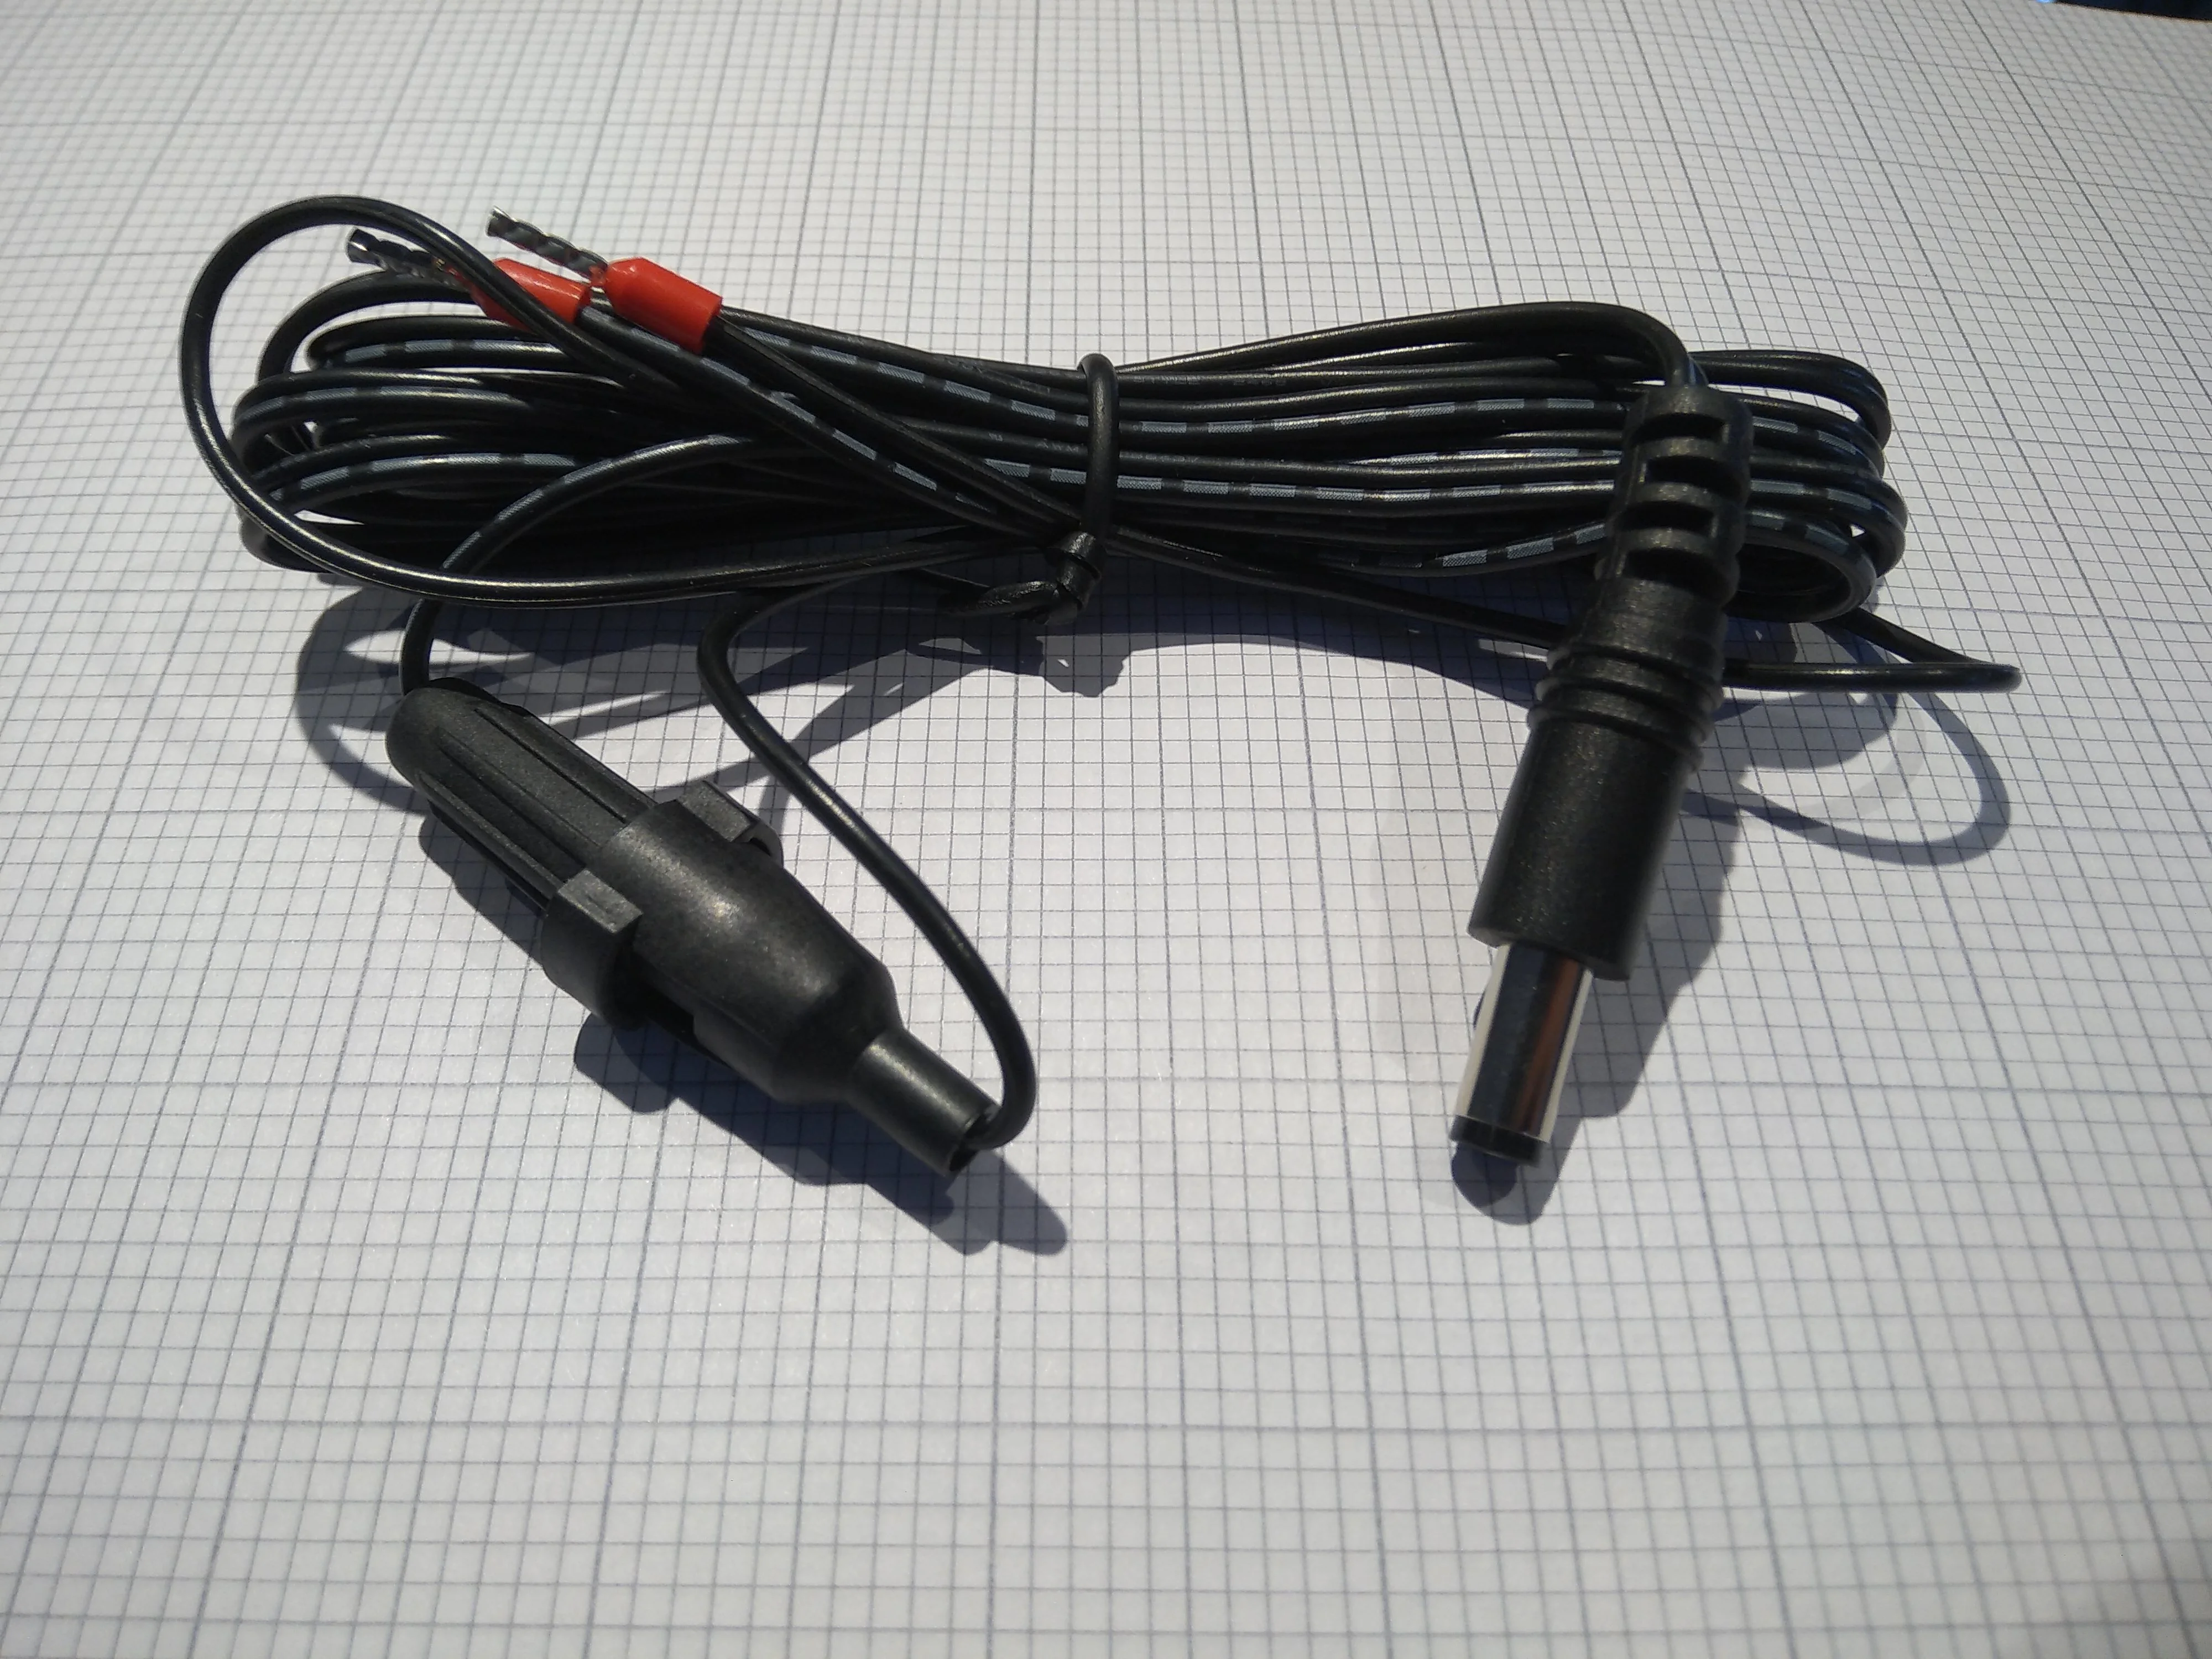
-
Plug the other terminal into the 0v or ground supply
-
Plug the DC Jack into the TMM Connect
Find your productive spindle power cables
- Attach the Current Transducer around a single phase of your 3-phase spindle power supply
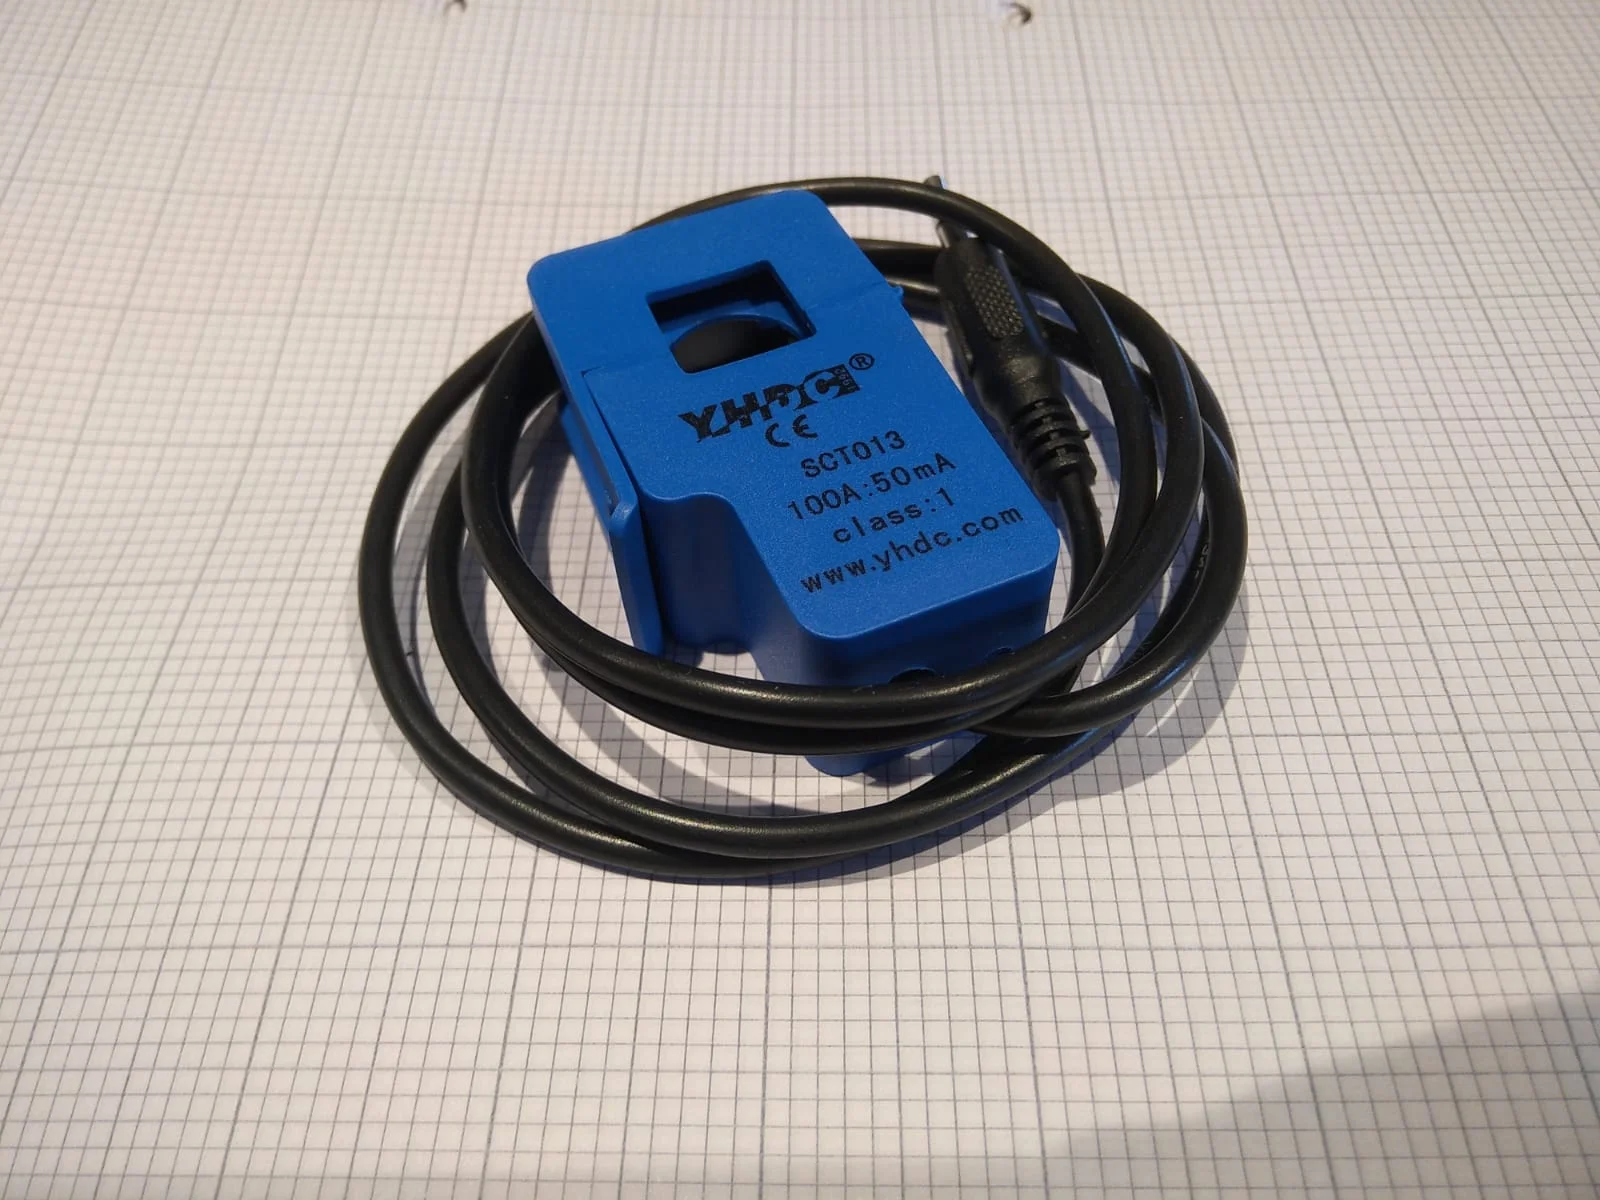
-
Plug the Current Transducer into your TMM Connect into the 3.5mm jack that’s labelled “1”
-
If you’ve got more productive spindles on the machine, for example a multi-tasking machine or lathe with two spindles, plug those extra current sensors into the extra machine monitoring inputs that are numbered.

Plug the current transducer into the front of your TMM Connect -
If you’ve opted to also measure the energy usage of your machinery, place a current sensor around one of the three phase main power cables. Insert this into the E input on your TMM Connect.
-
Peel the backing off the velcro, attach it to the back of your Data Retriever and attach the TMM Connect somewhere the WiFi signals should get out (most likely near the fan outlets).
-
Close the machine cabinet
-
Turn the machine on